Gram stain procedure: gram staining steps and results
There are majorly 4 steps of a gram stain. The steps in gram staining involve a series of staining and decolorization. The purpose of each step of a gram stain is to stain and decolorize the cells in order to differentiate the organisms in the Domain Bacteria according to their cell wall composition.
Yield: 1 Slide of Gram stain result
Cost: 5
Equipment
- 1 Bunsen burner
- 2 Alcohol-cleaned microscope slide
- 1 Slide rack
- 1 Microscope
Materials
- 2 g Crystal violet
- 20 ml Ethanol
- 0.8 g Ammonium oxalate
- 80 ml Distilled water
Instructions
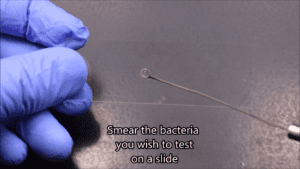
Application of the primary stain (crystal violet)
- The first of the gram stain steps is the application of the crystal violet (primary stain) to a heat-fixed smear. In this step, the crystal violet dye is used for the slide's initial staining.
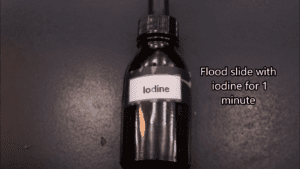
Addition of a mordant (Gram's Iodine)
- The second step in gram staining is the addition of gram's iodine which is also known as fixing the dye. Iodine serves as a mordant in the gram staining procedure. This involves using iodine to form a crystal violet-iodine (CV-Iodine) complex to prevent easy removal of the crystal dye. Therefore, the role of gram iodine in the gram stain procedure is to fix the primary stain and prevent the crystal violet from leaving the cell.
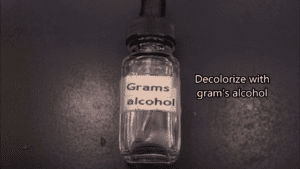
Rapid decolorization
- Decolorization with alcohol, acetone, or a mixture of alcohol and acetone is the third phase of the steps in gram staining. This third step of decolorization is a very crucial step among the 4 steps of a gram stain. This is because prolonged exposure to a decolorizing agent can remove all the stains from both gram-positive and gram-negative bacteria. Solvents of ethanol and acetone are often used as decolorizers to remove the dye. The basic mechanism behind this particular gram stain process is the ability of the bacterial cell wall to retain the crystal violet dye during solvent treatment. Based on the cell wall structure of bacterial cells, the gram-positive microbes have higher peptidoglycan content, while the gram-negative microbes have higher lipid content. All bacteria take up the crystal violet dye initially but when a solvent is used, the lipid layer from gram-negative bacteria dissolves. As the lipid layer is dissolved, the gram-negative microorganism loses the primary stain. This is different for the gram-positive organisms because their cell wall is dehydrated by the solvent. The closure of the pores of the gram-positive cell wall prevents the diffusion of the violet-iodine complex and so the bacteria remain stained, making it gram-positive.
Counterstaining
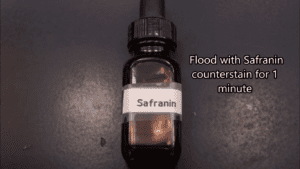
- The fourth and final phase of the gram stain steps is to use a counterstain. Usually, the counterstain used in the gram staining procedure is Safranin or basic fuchsin stain. This process is known as counterstaining and the aim is to give the decolorized gram-negative bacteria pink color for easier identification.
Video
Notes
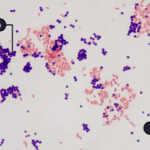
At the end of the gram staining procedure, gram-positive bacteria will be blue to purple in color whereas gram-negative bacteria will be red to pink in color.