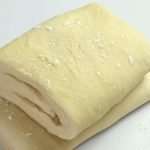
How to Make Puff Pastry Sheets at Home
Easy Homemade Puff Pastry Sheets - Today, I will be showing you how to make puff pastry dough, step by step with pictures. It is so easy to make sheets for your puff pastry recipes such as chicken pot pie and croissants. No need of buying it from the store again when you can make yours at home.
Servings 2 Puff Pastry Sheets
Calories 558kcal
Equipment
- Rolling Pin
- Mixing Bowl
- Cling Film
Ingredients
- 2 cups All-purpose flour - you need flour with gluten in order for the puff pastry sheet to be stretchy. Gluten-free flour can still be used but the sheets can easily cut.
- 1 cup frozen butter. - other fats or shortening such as lard or vegetable shortening can be used.
- 1 tbsp white granulated sugar
- ½ tsp salt
- ½ cup ice-chilled water
Instructions
- Chill your flour and the mixing bowl in the refrigerator for at least 30 minutes. Chilling is an important step in making puff pastry dough in order to prevent melting of the butter as well as keeping the dough firm and easy to work with it.
- Remove the bowl from the fridge after 30 minutes and then add 1 tbsp of sugar and 1/2 tsp of salt to the flour and mix to combine.
- Grate 1 cup of frozen butter into the mixing bowl containing the flour. Grating the butter makes it easier to mix and blend with the flour.
- Stir the grated butter and the flour together to combine completely, using a spatula until you have crumbs.
- Make use of ice-chilled water. Remember that maintaining the chilled state makes a good pastry dough that you can work with easily.
- Add ice-chilled water to the flour mixture and stir to form a dough. You need to add the water a little at a time.
- Mix the flour with your hands as you add the water until you have a firm puff pastry dough. Do not add too much water to the dough.
- Transfer the dough to a work surface or tabletop and mold it into a ball and then flatten it with your hands into a rectangular shape.
- Completely cover the puff pastry dough with a cling film and then keep it in the fridge for at least 1 hour. I prefer keeping it overnight for the gluten bonds to be formed which then makes the puff pastry sheets stretchy. Using gluten-free flour for making puff pastry sheets makes the sheets less stretchy and can easily cut when stretched because of the absence of gluten. If you are in a haste or need to use it the same day, keep it in the fridge at least for an hour.
- The next day or after an hour, remove the puff pastry dough from the fridge and start working on it.
- Unwrap the dough and then divide it into two equal halves. You can divide it into your desired number depending on the size of the puff pastry sheets you want. When working with smaller puff pastry sheets for making chicken pot pie in small cups, you don't really need the sheets to be wide. But when making wider pies, you need it wide; so divide the dough based on the type of puff pastry recipes.
- Dust your work surface or the tabletop with some flour and place half of the divided dough on it. For the remaining puff pastry dough, return it to be chilling in the fridge. You need everything chilled to make it easier for you to make the puff pastry sheets.
- Now, begin rolling the dough into a flattened and rectangular shape using your rolling pin. As you roll the dough, you can continuously dust the surface of the dough as well as rubbing the rolling pin with a light amount of flour to prevent the rolling pin from sticking to the dough.
- Once you have a flat pastry dough, start laminating the dough. Fold both ends of the dough to the middle.
- Next, flip it over then roll again into a flat rectangular shape. Again, once you have another flat pastry dough, fold each end to the middle and then flip over and roll again. Continuously repeat this folding and rolling until the whole butter is completely blended with the dough. You need to do this quickly to maintain the chillness of the dough. Make sure the dough is chilled as you work on it. If you notice the puff pastry dough becoming sticky, chill again in the fridge for some minutes (about 15 to 30 minutes) and then remove and continue to work on it until the butter blends with the dough.
- When the butter blends with the dough, your homemade puff pastry sheet is ready.
- You can cut the edges with a knife or pizza cutter to have a perfect rectangular shape, and then lightly sprinkle some flour over it and wrap it with a cling film; you can now use the puff pastry sheet you made for any puff pastry recipe such as chicken pot pie or croissants.
- Ready to use homemade puff pastry sheets
Video
Notes
Gluten free Puff Pastry Sheets
To make gluten free puff pastry sheets, use gluten-free flour such as almond flour, cornstarch (corn flour), rice flour, tapioca flour, etc. You may need to combine some of the gluten-free flour in order to have a stretchy texture when you make the puff pastry sheets. You can combine almond flour with tapioca flour to have a mixture of flour that can be good for making gluten free puff pastry sheets that will have similar stretchiness as the regular sheets.Storage
You can store the homemade puff pastry sheet for 3 months in the fridge, but ensure to wrap it with a cling film to prevent moisture from touching it. You can as well keep them frozen in the freezer for a longer time.Using Frozen Puff Pastry Sheets
When frozen, puff pastry sheets can still be used. Place the frozen puff pastry sheets on the tabletop and allow them to thaw before using them.Recipes with Puff Pastry Sheets
- Beef Wellington
- Parmesan twists
- Nigerian meat pies
- Peach roses recipe
- Cinnamon rolls
- Croissants
- Chicken pot pie
- Puff pastry baked eggs
- Apple pie
- Puff pastry pizza
- Ham and cheese rolls
- Buttercream Mille Feuille dessert
- Puff pastry donuts